Windows 10 to jedna z najbardziej oczekiwanych wersji systemu Windows firmy Microsoft. Chociaż system Windows 8 stworzył nowy trend w świecie systemów operacyjnych dla komputerów stacjonarnych, miał pewne problemy w projektowaniu i wydajności, które były głównym przedmiotem zainteresowania firmy Microsoft w systemie Windows 10. Tak więc ostateczna kompilacja systemu Windows 10 została ujawniona 29 lipca 2015 r. a także smartfony.
Zawierał wiele modyfikacji uwzględniających wady systemu Windows 8. W rzeczywistości jest to zaawansowana wersja systemu Windows, ale nadal istnieje szereg konsekwencji występujących każdego dnia z różnymi użytkownikami.
Główną częścią tych konsekwencji są błędy, które pojawiają się podczas próby wykonania określonego zadania. Wiele osób napotkało komunikat o błędzie podczas próby otwarcia innego oprogramowania i przeglądarek w systemie Windows 10. Ten błąd zawiera komunikat o błędzie informujący, że aplikacja nie mogła zostać poprawnie uruchomiona (0xc0000005). Kliknij OK, aby zamknąć aplikację . Ten błąd występuje zwykle w przeglądarkach internetowych, ale nie ogranicza się do nich. Każda aplikacja w systemie Windows może przestać odpowiadać z powodu tego błędu. Dlatego należy to naprawić, aby przywrócić działanie tego niezbędnego oprogramowania.

12.11.2016: Użytkownicy zgłosili, że wymienione poniżej metody będą działać również w systemie Windows 7.
Przyczyna błędu systemu Windows 10 0xc0000005:
Istnieje wiele znanych powodów, dla których ten błąd zakłóca działanie różnych programów w systemie Windows 10. Jedną z przyczyn uznawanych za główną przyczynę jest program antywirusowy innej firmy, powodujący konflikty z plikami wykonywalnymi i wpływający na ich działanie. Z drugiej strony rejestry mogą zostać uszkodzone z powodu złośliwego oprogramowania i wirusów, które powodują nieprawidłowe działanie programów. Czasami przyczyną tego błędu mogą być również złe sterowniki sprzętu .
Rozwiązania naprawiające błąd systemu Windows 10 0xc0000005:
Z powodów wymienionych powyżej rozwiązania są proste. Dlatego skorzystaj z poniższych metod, aby pozbyć się tego frustrującego komunikatu o błędzie.
Napraw uszkodzone pliki systemowe
Pobierz i uruchom Restoro, aby zeskanować i przywrócić uszkodzone i brakujące pliki stąd , po zakończeniu wykonaj poniższe rozwiązania. Przed przystąpieniem do poniższych rozwiązań należy upewnić się, że wszystkie pliki systemowe są nienaruszone i nieuszkodzone.
Metoda nr 1: Naprawianie programu antywirusowego
Programy antywirusowe mogą wpływać na pliki wykonywalne wielu programów. Tak więc, aby rozwiązać ten problem, musisz wyłączyć program antywirusowy innej firmy, aby sprawdzić, czy to on jest winowajcą, czy nie. Należy pamiętać, że wyłączenie programów antywirusowych może spowodować poważne zagrożenie dla komputera podłączonego do Internetu.
Możesz również polegać na własnym oprogramowaniu zabezpieczającym systemu Windows, np. Windows Defender . Ma taką samą funkcjonalność jak każdy inny program antywirusowy. Możesz wyłączyć program antywirusowy, przechodząc do jego Ustawień i wyłączając osłonę.

Po wyłączeniu ponownie sprawdź błąd. Jeśli problem nadal występuje, przejdź do następnej metody.
Metoda nr 2: Naprawianie rejestrów
Rejestr jest centralną bazą danych systemu Windows, który jest stale wykorzystywany przez komputer do pomocy odczytać wiele różnych plików i ustawień, że musi uciekać. Rejestry mogą ulec uszkodzeniu z powodu uszkodzenia niektórych plików wymaganych do ułożenia wszystkiego na swoim miejscu. Dlatego większość ekspertów zaleca wykonanie kopii zapasowej Rejestru i przechowywanie tej kopii zapasowej na zwykłej pamięci USB, aby w przypadku uszkodzenia można było przywrócić Rejestr do poprzedniego stanu. Jeśli jednak nie utworzyłeś kopii zapasowej rejestru, wykonaj następujące kroki, aby naprawić rejestry i rozwiązać błąd 0xc0000005 .
1. Pobierz oprogramowanie do czyszczenia rejestru z tego łącza .
2. Po pobraniu zainstaluj go przy użyciu zalecanych ustawień. Otwórz oprogramowanie po zakończeniu procesu instalacji.
3. W interfejsie kliknij kartę Rejestr znajdującą się w lewym okienku i kliknij przycisk oznaczony jako Skanuj w poszukiwaniu problemów . Rozpocznie się wyszukiwanie błędów w rejestrze, a po zakończeniu wyszukiwania zostanie aktywowany przycisk Napraw wybrany problem . Kliknij ten przycisk, a wszystko zostanie naprawione.

Metoda nr 3: Naprawianie wadliwych sterowników
Sterowniki to programy ułatwiające komputerowi komunikację z podłączonym do niego sprzętem. Tak więc, gdy są uszkodzone, sprzęt ma tendencję do powodowania usterek . Naprawienie tych wadliwych nurków może pomóc na wiele sposobów. Wykonaj poniższe kroki.
1. Otwórz Menedżera urządzeń , naciskając Win + X i wybierając go z listy.
2. W Menedżerze urządzeń przewiń w dół, aby sprawdzić, czy jest jakiś sprzęt z żółtym znakiem. Jeśli tak, kliknij tam prawym przyciskiem myszy i wybierz Aktualizuj oprogramowanie sterownika . Jeśli niedawno zainstalowałeś sterowniki, zainstaluj je ponownie.

3. W wyświetlonym oknie kliknij opcję Wyszukaj automatycznie zaktualizowane oprogramowanie sterownika, aby umożliwić automatyczne wyszukiwanie i instalowanie sterowników. Jeśli sterowniki zostały pobrane ręcznie, kliknij opcję poniżej, aby je przeglądać i instalować. Po zakończeniu procesu sprawdź, czy nie wystąpił błąd.

Metoda nr 4: Napraw BCD
Ta metoda jest wykonywana przez użytkowników na własne ryzyko. To zadziałało dla niektórych, a dla niektórych nie. Po wykonaniu czynności opisanych w tym przewodniku trzeba będzie również ponownie aktywować system Windows.
- Trzymając systemu Windows klucz i naciśnij X . Wybierz wiersz polecenia (administrator)
- Wpisz „ bcdedit” i naciśnij ENTER. Jeśli ścieżka do programu ładującego system Windows to xOsload.exe, musisz usunąć niektóre pliki i naprawić BCD. Możesz to zobaczyć w polu PATH po wykonaniu polecenia „bcdedit”.
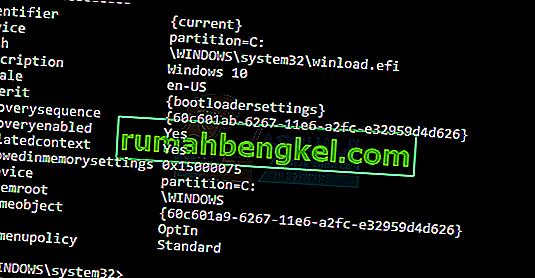
- Po zakończeniu wykonaj poniższe polecenia, niektóre mogą zwrócić nie znaleziono, ale zignorują błędy i przejdź do ostatniego. Upewnij się, że naciskasz klawisz ENTER po każdym poleceniu.

Del D: \ Windows \ System32 \ xOsload.exe Del D: \ Windows \ System32 \ xNtKrnl.exe Del D: \ Windows \ System32 \ Drivers \ oem-drv64.sys attribute c: \ boot \ bcd -h -r -s ren c: \ boot \ bcd bcd.old bootrec / rebuildbcd
Metoda 5: Sprawdzanie dostępności aktualizacji systemu Windows
Aktualizacje systemu Windows często zawierają poprawki niektórych błędów i usterek, ale są również znane z tego, że ustępują nowym problemom na komputerach użytkowników. Jednak na tym etapie będziemy sprawdzać dostępność aktualizacji dla Twojego systemu operacyjnego, ponieważ firma Microsoft często usuwa wszelkie problemy wynikające z ich aktualizacji. Aby to zrobić, postępuj zgodnie z poniższym przewodnikiem.
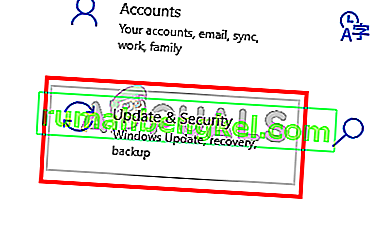
- Naciśnij „Windows” + „I”, aby otworzyć ustawienia systemu Windows.
- W ustawieniach kliknij opcję „Aktualizacje i zabezpieczenia” iz lewej strony wybierz opcję „Windows Update” .
- Na następnym ekranie kliknij opcję „Sprawdź aktualizacje” , a system Windows automatycznie poprosi o sprawdzenie dostępnych aktualizacji.

- Po zakończeniu sprawdzania aktualizacji kliknij przycisk „Pobierz” , aby rozpocząć pobieranie i instalację nowych aktualizacji na komputerze.
- Po zainstalowaniu tych aktualizacji sprawdź, czy udało się rozwiązać problem na komputerze.


Metoda 6: Przywracanie komputera
Jeśli właśnie zacząłeś otrzymywać ten problem, może on być uruchamiany z powodu wadliwej instalacji sterownika lub nawet z powodu nieuczciwej aplikacji, którą mogłeś niedawno zainstalować na swoim komputerze. Dlatego na tym etapie przywracamy stan komputera do wcześniejszego stanu i miejmy nadzieję, że powinno to rozwiązać nasz problem, jeśli wynika to z wyżej wymienionych powodów. W tym celu:
- Naciśnij „Windows” + „R”, aby otworzyć okno Uruchom.
- Wpisz „rstrui” i naciśnij „Enter”, aby otworzyć okno zarządzania przywracaniem.
- Kliknij „Dalej” i zaznacz opcję „Pokaż więcej punktów przywracania” .
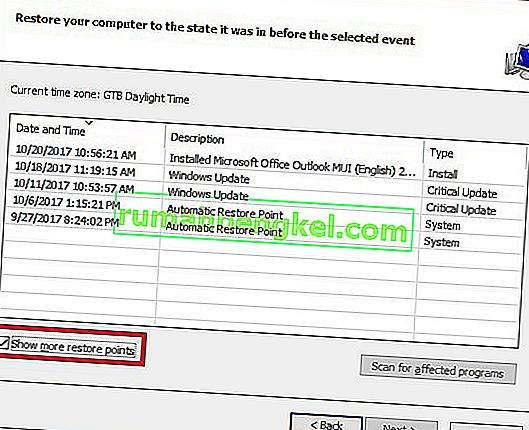
- Wybierz punkt przywracania z listy, która jest przed datą rozpoczęcia występowania tego problemu.
- Kliknij ponownie „Dalej” i postępuj zgodnie z instrukcjami wyświetlanymi na ekranie, aby przywrócić wszystko do wybranej daty.
- Po zakończeniu przywracania sprawdź, czy problem nadal występuje.


Metoda 7: Włącz zaporę
W niektórych przypadkach jest możliwe, że błąd jest wywoływany, ponieważ aplikacja jest podejrzana lub przynajmniej jeśli została oznaczona jako podejrzana, a Zapora systemu Windows nie jest uruchomiona na komputerze, aby zweryfikować to podejrzane. Dlatego w tym kroku upewnimy się, że Zapora systemu Windows jest włączona, aby pozbyć się tego błędu. Za to:
- Naciśnij „Windows” + „R”, aby otworzyć okno Uruchom.
- Wpisz „Panel sterowania” i naciśnij „Enter”, aby uruchomić klasyczny interfejs Panelu sterowania.
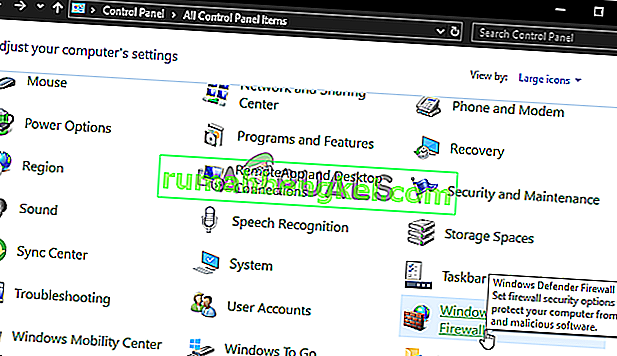
- W Panelu sterowania kliknij opcję „Wyświetl według:” i wybierz przycisk „Duże ikony” .
- Po dokonaniu tego wyboru kliknij opcję „Zapora systemu Windows Defender” , aby uruchomić zaporę, a następnie wybierz opcję „Włącz lub wyłącz zaporę systemu Windows Defender”.
- Upewnij się, że zaznaczono opcję „Włącz zaporę systemu Windows Defender” dla obu dostępnych opcji włączania zapory.
- Po dokonaniu tego wyboru zapisz zmiany i zamknij okno.
- Po wykonaniu tej czynności sprawdź, czy problem nadal występuje.


Metoda 8: Uruchom skanowanie SFC
W niektórych sytuacjach mógł zostać zainstalowany zły sterownik na komputerze lub w pewnym momencie, z powodu awarii pamięci masowej, niektóre pliki systemowe lub sterowniki mogły zostać uszkodzone. Dlatego na tym etapie przeprowadzimy pełne skanowanie systemu, aby zidentyfikować wszelkie sterowniki, które nie mają podpisów lub naprawić wszelkie nieprawidłowości w plikach systemowych. Za to:
- Naciśnij „Windows” + „R”, aby otworzyć okno Uruchom.
- Wpisz „cmd”, a następnie naciśnij „Shift” + „Ctrl” + „Enter”, aby nadać uprawnienia administratora. Uruchamianie wiersza polecenia
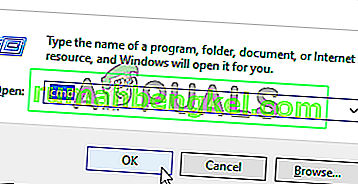
- Wpisz następujące polecenie w wierszu polecenia i naciśnij „Enter”, aby je wykonać.
sfc / scannow
- Let the computer scan for any broken or corrupted items and it should automatically replace them with working ones.
- Check to see if doing so fixes the error message.

Method 9: Disabling Data Execution Prevention
Data Execution Prevention is a program that prevents certain programs or executables from being able to run on your computer because it suspects that they might be viruses. Due to this prevention, sometimes, as a false alarm, legit applications might also face issues while trying to run on your computer. Therefore, in this step, we will be disabling this setting from the system configuration panel. For that:
- Press ‘Windows’ + “R’ to open the Run prompt.
- Type in “Control Panel” and press “Enter” to launch the classical control panel interface.

- Inside the Control Panel, click on the “View By:” icon and then select the “Large Icons” option.
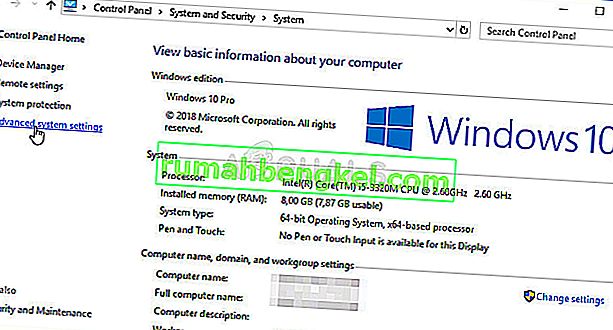
- After selecting Large Icons, select the “System” option.
- Click on the “Advanced System Settings” option on the left side of the screen.
- In the advanced System Settings, click on the “Advanced” tab from the top.
- In the advanced tab, click on the “Settings” option under the “Performance” heading.
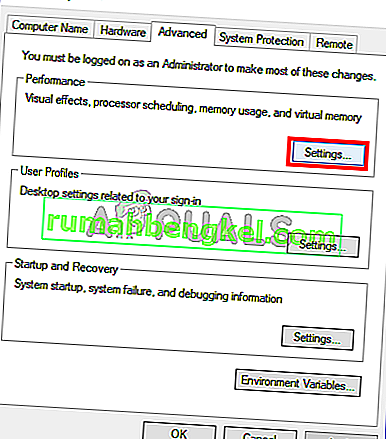
- On the next window that opens up, click on the “Data Execution Prevention” tab, and then select the “Turnon DEP for all programs except thoseI Select” option.
- After that, click on the “Add” option and point to the executable of the application that you are facing issues with.
- This way, that application will no longer come under the jurisdiction of the DEP program.
- Check to see if doing so has fixed the issue.


If the above process is unable to fix the issue, it might be because the executable isn’t the only one being affected by the DEP program. Sometimes the DEP might actually be preventing a herd of executables from being run on the computer and to counter this we will be disabling DEP completely.
Disabling DEP completely cannot be done through any Windows setting and it needs to be done manually through the command prompt. Remember to take this step as a last resort because this can in some cases makes your computer more vulnerable to viruses and malware attacks. In order to disable DEP through the command prompt:
- Press “Windows” + “R’ to open the Run prompt.
- Inside the Run prompt, type in “cmd” and then press “Shift” + “Ctrl” + “Enter” to launch in admin mode.
- Inside the command prompt, type in the following command and press “Enter” to execute it on your computer.
bcdedit.exe /set {current} nx AlwaysOff - Once the command has been executed, run the application that you want to and check to see if the error message still persists.
Method 10: Disable Firewall and Windows Defender
In some situations, the executable that you want to run on the computer might actually be blocked by the Firewall and it would not be able to make contact with its servers this way. Therefore, we will have to allow the executable in our Firewall for both public and private networks which should get it working if the Firewall is preventing it.
In addition to that, sometimes the Windows Defender might prevent the application from running on your computer because its local files might be suspicious and not properly signed. This can be due to a false alarm as well so we will be disabling the Windows Defender for the application as well by adding an exclusion. In order to do that:
- Press “Windows” + “R” to launch the Run prompt.
- Type in “ControlPanel” and press “Enter” to launch the classical control panel interface.
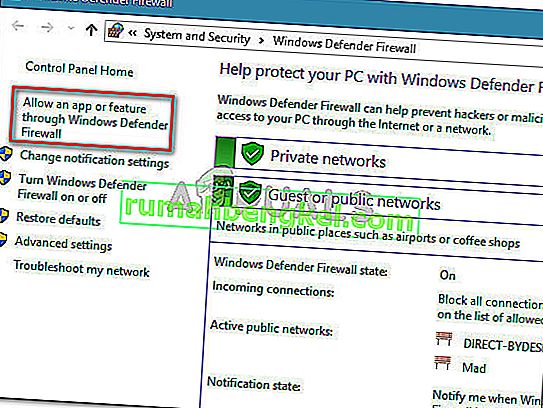
- Click on the “View by:” button, select “Large Icons” and then click on the Windows Defender Firewall option.
- Select the “Allow an app orfeature through the Firewall” button on the left pane and then click on the “Change Settings” button and accept the prompt.
- From here, make sure that you check both the “Public” and the “Private” options for the application and its entries.
- Save your changes and exit out of the window.
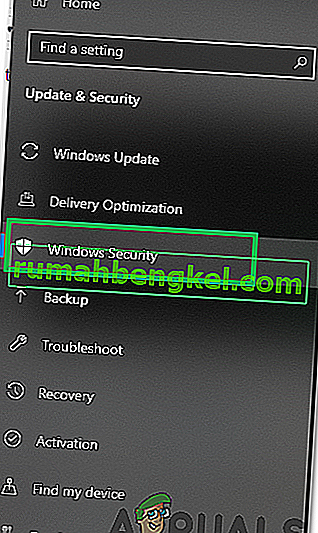
- After that, press “Windows” + “I” to launch the settings and click on the “Updateand Security” option.

- From the left pane, click on the “Windows Security” button and then click on the “Virus and Threat Protection” button.
- Select the “Manage Settings” button under the Virus and Threat Protection Settings heading.
- Scroll down and click on the “Add or Remove Exclusions” button in the next window.
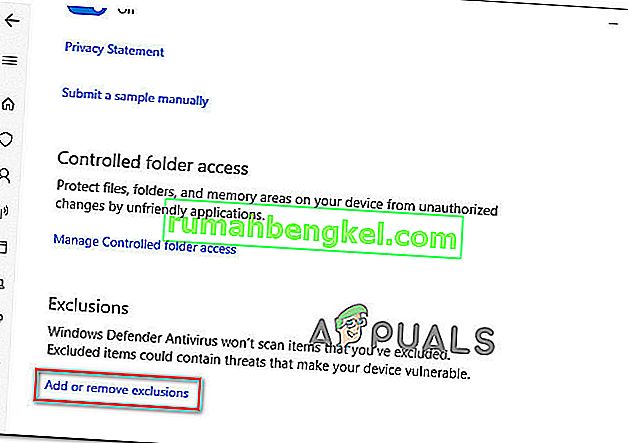
- Click on the “Add an Exclusion” option and select “Folder’ from the File type.
- Make sure to specify the application’s folder with which the issue is occurring and exit out of this window after saving your changes
- Check and see if doing so has fixed the error message.


Method 11: Reinstall Firefox
If you are getting this error while trying to launch Firefox, it might be occurring because the applications haven’t been installed properly on your computer. Therefore, in this step, we will be launching the app management window and uninstalling Firefox after which we will reinstall it completely by downloading it from the Firefox website. For that:
- Press “Windows” + “R” to open the Run prompt.
- Type in “appwiz.cpl” and press “Enter” to open the app management window.

- In the app management window, scroll down and right-click on the “Firefox” application.
- Select “Uninstall” from the list and then follow the on-screen instructions to remove the software from your computer.
- Repeat this step for all instances and bundled applications of the software installed on your computer.
- Make sure to disable any third-party antiviruses at this point to make sure that the software is installed smoothly.
- Head on over to the Mozilla website and click on the download button.

- Click on the downloaded executable and install it on your computer following the on-screen instructions.
- Check to see if doing so has fixed the error message on your computer.


Method 12: Scanning for Malware
It is possible in some cases that the computer has acquired malware that is preventing the user from being able to run all the system functions on their computer. Therefore, in this step, we will be using the default Windows Defender to scan our computer thoroughly for any viruses or malware that might’ve found its way on our computer. For that:
- Press the “Windows” + “I” keys simultaneously on your PC to open the Settings tab.
- Navigate to the Update& Security option and then click on the “Windows Security” button on the left tab.
- After that, click on the “Open Windows Security” and select the “Virus and Threat Protection” option.
- After that, click on the “Scan Options” button below the “Quick Scan” window.
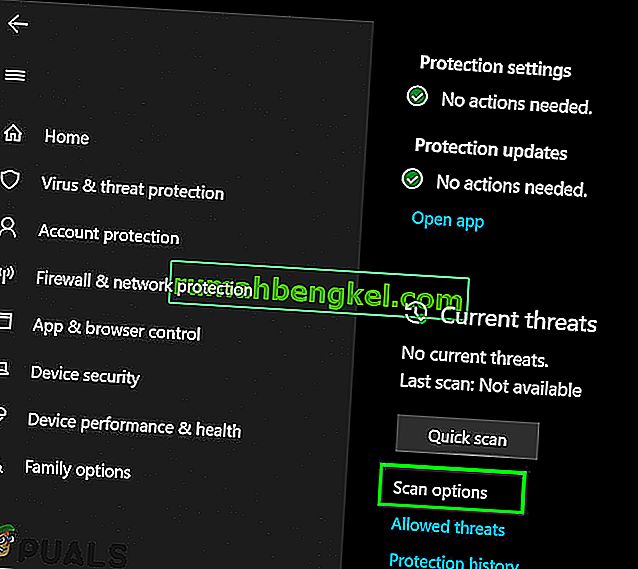
- Click on the “Full Scan” option and then hit the button of “Scan Now”.
- Wait for a few seconds while this process gets completed and then finally check if the error gets resolved now.


Microsoft Security Scanner is an additional tool that you can use to test the system for any further viruses and malware because sometimes the default tool isn’t able to perform the scan properly. Therefore, in this step, if the issue still hasn’t been resolved, we will be using the Microsoft Security Scanner to further make sure for any issues.
- Launch your browser and download the Microsoft Security Scanner from here.
- After downloading the executable, run it on your computer and let it install.
- Accept the License Agreement terms and click on “Next”.

- Select “Full Scan” and click on “Next”.
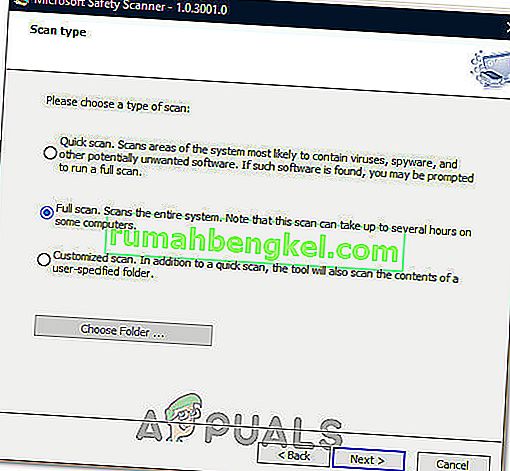
- After you opt for a full scan, the software will start scanning your entire computer to look for any malware or viruses that might’ve disguised themselves as normal executables or applications.
- After this scan has been finished, check to see if the error message still persists.


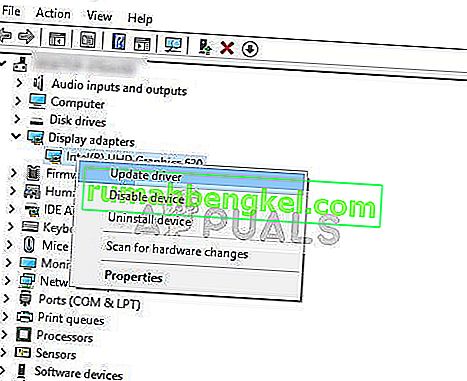
Method 13: Install Missing Drivers
It is possible in some situations that your device is missing certain drivers due to which this particular issue is being triggered on your computer. Therefore, we will be checking for any missing drivers and then we will check to see if the error is fixed. In order to do this, follow the guide below.
- Download Driver Easy on your computer.

- Run the downloaded executable and install the software on your computer.
- Run the check and see if there are any missing drivers on your computer.
- Install these missing drivers and then install them either manually or automatically using the Software.
- After installing all the missing drivers, check to see if the issue still persists.

Method 14: Reconfigure Registry
It is possible that in some cases, you haven’t properly configured all the registry settings or that you unknowingly configured something incorrectly. Therefore, in this step, we will be reconfiguring our Registry to fix a certain key that sometimes, if misconfigured, causes this particular error on Windows. In order to do this, follow the guide below.
- Press “Windows” + “R” to open the Run prompt.
- Type in “regedit” and press “enter” to launch the registry editor.

- Inside the registry editor, navigate to the following location.
HKLM\SOFTWARE\Microsoft\Windows NT\CurrentVersion\Windows\AppInit_Dlls
- Double click on the “LoadAppInit_DLLs” entry on the right side of the screen.
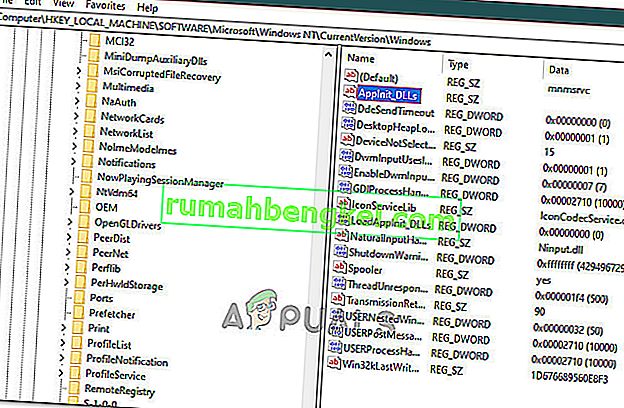
- Change the value of this registry from “1” to “0”.
- Save your changes and exit the registry editor.
- Check to see if doing so has fixed the error.


Method 15: Update Disk Drivers
In some cases, the Disk Drivers that are being used to control your Storage and other Disks installed on the computer might have been outdated due to which the error is being triggered. Therefore, in this step, we will first be opening the Device Management Window and from there, we will be updating these drivers. In order to do so, follow the steps mentioned below.
- Press “Windows’ + “R” to open the Run prompt.
- Type in “Devmgmt.msc” and press “Enter” to launch the device management window.
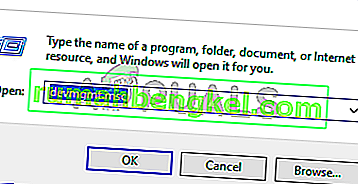
- In the Device Manager, double click on the “DiskDrives” option to expand it.
- Right-click on the storage device listed and select the “Update Driver” option.
- Select the “Search Automatically for Drivers” option and let the setup search.
- If there are any drivers available, Windows will automatically check for them and install them on your computer.
- Check to see if doing so has fixed the issue.


Method 16: Disabling Automatic Updates and Uninstalling Updates
It is possible in some cases, that this error is stemming from a faulty update install. Microsoft is notorious for pushing out updates that aren’t properly customized to work for all hardware combinations and often go on to break things instead of making them better. Therefore we will make sure that the recent update isn’t installed on our computer.
In order to do this, we will have to first disable automatic updates on our computer and then we will be uninstalling the recently installed updates. Make sure to back up any important data that you don’t want to lose just in case this goes bad.
- Press “Windows” + “R’ to open the Run prompt.
- Type in “service.msc” and press “Enter”.

- Scroll through the list and double click on the “Windows Update” service.
- Click on the “Stop” button and then click on the “Startup Type” dropdown.
- Select “Disabled” from the list and select the “Apply” button from the window.
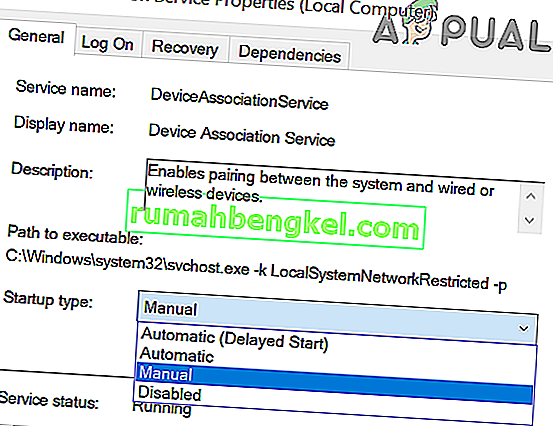
- Click on “OK” to close out of this window.
- Check to see if doing so has stopped your computer from updating.


After stopping the computer from updating, we will now be uninstalling the recent updates that have been installed on your computer. For that:
- Press “Windows” + “I” buttons to open the settings.
- In settings, click on the “Update and Security” option and then select the “Windows Update” button from the left pane.

- In the Windows Update, click on the “View Update History” option.
- In the Update History, click on the “Uninstall Updates” option and it should take you to the uninstallation screen where all the recently installed updates will be listed.
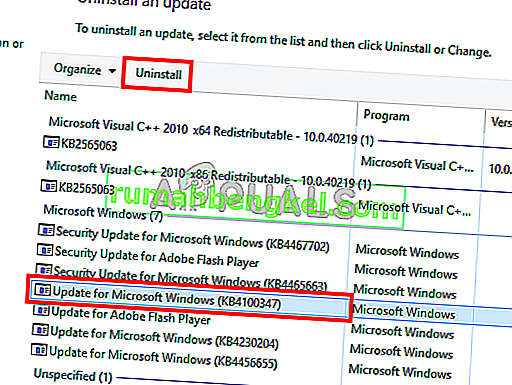
- From the list, right-click on the update that was installed recently and caused this error on your computer.
- Right-click on this update and select the “Uninstall” button to remove it completely from the computer.
- Follow through with the on-screen instructions.
- Check to see if uninstalling has fixed this issue.


Additional Fixes:
- In addition to some of the recommendations given above, you should try to check if there are any bad memory modules (RAM) installed on your computer which can be a cause of this.
- Sprawdź również, czy nie przetaktowałeś pamięci RAM do poziomu przekraczającego zalecany limit. Jeśli to zrobiłeś, spróbuj przywrócić domyślne ustawienia fabryczne i sprawdź, czy to rozwiąże problem.