Steam Cloud zapewnia łatwy i przejrzysty sposób zapisywania danych gry w zdalnym systemie przechowywania. Pliki określone w konfiguracji Auto-Cloud lub jeśli zostaną zapisane na dysku, zostaną automatycznie replikowane na serwery chmury Steam (przy użyciu Cloud API) po zakończeniu gry.

Jest to szczególnie przydatne, jeśli użytkownik zmienia swój komputer. Postęp w grze zostanie wznowiony przez Cloud API lub odczyt bezpośrednio z dysku. Pliki zostaną automatycznie pobrane przed uruchomieniem gry, ponieważ podałeś już swoje dane logowania Steam. Głównym zadaniem Steam Cloud jest zapewnienie synchronizacji wszystkich plików na wszystkich komputerach, z których korzysta użytkownik.
Użytkownicy mają możliwość wyłączenia całej synchronizacji z chmurą obecną w ustawieniach Steam w kliencie. Użytkownicy mają również możliwość wyłączenia synchronizacji z chmurą w każdej grze. Ale zanim przejdziesz do rozwiązań, zaktualizuj klienta Steam do najnowszej wersji.
Jakie są różne metody wykorzystania Steam Cloud?
Steam oferuje dwie różne metody wykorzystania Steam Cloud.
Najpierw jest API Steam Cloud. Cloud API zapewnia szereg funkcji, które pozwalają na bezpośrednią integrację Steam Cloud z Twoją grą. Cloud API ma również za zadanie izolować od siebie poszczególne pliki użytkowników Steam, a także zapewnia lepszą kontrolę nad Steam Cloud jako całością.
Drugi to Steam Auto-Cloud. Ta funkcja została zaprojektowana przede wszystkim dla starszych gier, w których trudno było korzystać z Cloud API. Jest to szybki sposób na rozpoczęcie korzystania ze Steam Cloud, ale brakuje mu elastyczności i mocy, które zapewnia API Steam Cloud.
Twórcy zalecają korzystanie z Cloud API zamiast Steam Auto-Cloud, ponieważ zapewnia to głębszą i skuteczniejszą integrację i dostosowywanie. Pozwala w pełni wykorzystać chmurę Steam.
Jak rozwiązać konflikt Steam Cloud?
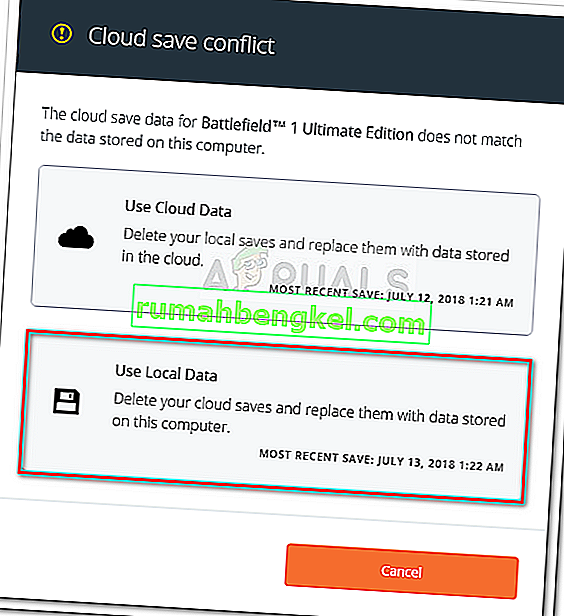
Konflikt Steam Cloud występuje, gdy zawartość Steam Cloud nie pasuje do lokalnych plików gry przechowywanych na dysku twardym. Może się to zdarzyć na komputerze, którego używasz w tym czasie lub mogło wystąpić wcześniej na innym komputerze. Ponieważ plik został zmodyfikowany w dwóch różnych lokalizacjach bez synchronizacji między nimi, Steam nie może określić, który plik zachować.

Najprawdopodobniej wybierzesz plik, który był ostatnio modyfikowany. Oznacza to, że najnowsze zmiany w Twojej grze zostaną zapisane. Należy uważnie przyjrzeć się wyświetlanym w oknie danych. Uważnie przejrzyj datę i godzinę kontekstu i uwzględnij to, kiedy ostatnio grałeś w grę na Steam. Ten kontekst może pomóc w określeniu, którą wersję zachować.
Pamiętaj, że granie w gry w trybie offline uniemożliwi synchronizację gier i jest to najbardziej prawdopodobna przyczyna konfliktu Steam Cloud.
Co się stanie, jeśli Steam nie może zsynchronizować plików z chmurą?
Ten błąd oznacza, że Steam nie mógł zsynchronizować twoich plików lokalnych z Steam Cloud. Może to być tymczasowy problem, z którym mogą borykać się serwery Steam Cloud. Możesz sprawdzić status Steam Cloud na stronie Steam, aby upewnić się, że problem leży po ich stronie.

Jeśli usługa chmury Steam działa doskonale, oznacza to, że problem jest po Twojej stronie. Możesz sprawdzić połączenie Steam i rozwiązać problemy. Możesz również sprawdzić, czy tylko Ty masz problemy z synchronizacją ze Steam Cloud.
Jeśli zignorujesz wiadomość i klikniesz „Zagraj w grę”, może to spowodować potencjalny konflikt między Twoimi lokalnymi plikami a Steam Cloud. Może również spowodować utratę postępów i danych gry.
Co się stanie, jeśli stracę plik lub postęp po przejściu na inny komputer?
Jeśli brakuje ci najnowszych postępów i dwukrotnie sprawdziłeś, że gra używa Steam Cloud przy użyciu Ustawień, oznacza to, że albo Steam nie był w stanie pomyślnie zsynchronizować twoich danych, albo synchronizacja spowodowała, że twoje poprzednie dane zostały przesłane do Chmura.
Możliwe, że oryginalny plik lub postęp nadal znajduje się na starszym komputerze i nie można go zsynchronizować. Jest możliwe, jeśli uruchomisz Steam na tym komputerze, twój postęp będzie widoczny. Jeśli tak, zostanie automatycznie zaktualizowany na wszystkich innych komputerach połączonych z Twoim kontem Steam.
Ponadto wiele gier nie korzysta z funkcji Steam Cloud. Możesz sprawdzić oficjalną stronę gry, czy wsparcie Steam Cloud jest dostępne. Jeśli tak nie jest i nie masz dostępu do starszej maszyny, oznacza to, że Twoje postępy zostały utracone i nie ma możliwości ich odzyskania.
Jak usunąć pliki przechowywane na serwerach Steam Cloud?
Steam Cloud służy do tworzenia kopii zapasowych każdego postępu w Twojej grze, dzięki czemu nie stracisz swoich postępów, jeśli uzyskasz dostęp do gry z dowolnego innego komputera. Możesz potwierdzić, że Twoje postępy są zapisywane przez chmurę, korzystając z następującej metody.
Sprawdź, czy Twoja gra jest tworzona.
- Otwórz swojego klienta Steam . Otwórz jego Ustawienia , naciskając przycisk Steam znajdujący się w lewym górnym rogu okna i wybierając opcję.
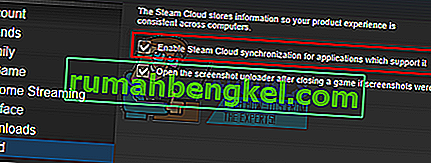
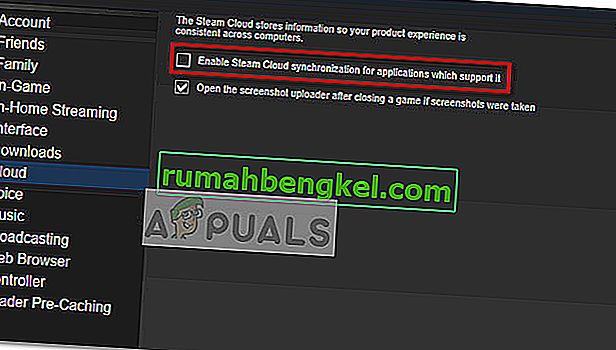
- Otwórz zakładkę Cloud znajdującą się po lewej stronie ekranu. Sprawdź, czy opcja „ Włącz synchronizację Steam Cloud dla aplikacji, które ją obsługują ” jest zaznaczona.
- Następnie kliknij kartę Biblioteka znajdującą się w górnej części klienta Steam. Tutaj zostaną wymienione wszystkie Twoje gry.
- Kliknij grę prawym przyciskiem myszy i wybierz Właściwości . Następnie przejdź do karty Aktualizacje znajdującej się w górnej części okna.
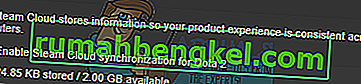
- W dolnej części okna zobaczysz opcję „ Włącz synchronizację Steam Cloud dla [nazwa gry] ”. Upewnij się, że opcja jest zaznaczona .


Jeśli masz włączone obie opcje, oznacza to, że twoja gra jest tworzona przez Steam Cloud i możemy również usunąć dane.
Co to jest mechanizm tworzenia kopii zapasowych?
Pierwszą rzeczą, którą powinieneś wiedzieć, jest to, że istnieją trzy wersje zapisanych danych gry
- Oryginalna wersja jest przechowywana w folderze AppData ( D1 ).
- Wersja w chmurze jest przechowywana w lokalizacji Steam / userdata / SteamID / AppID ( D2 ).
- Wersja chmurowa przechowywana na serwerach w chmurze Steam ( D3 ).
Zwróć uwagę na adnotacje (D1, D2, D3), których używaliśmy, ponieważ będziemy się do nich często odnosić w przyszłości.
Gdy uruchamiasz grę po raz pierwszy, D1 jest tworzone automatycznie. Po zakończeniu gry dane gry są aktualizowane w D1 i automatycznie kopiowane do D2. Następnie D2 jest następnie synchronizowany z D3, w ten sposób przesyłając całą zawartość gry.
Jeśli po raz pierwszy uruchomisz grę z innego komputera, jeśli Steam ma D3 na swoich serwerach, ale nie wykryje D2 na komputerze, automatycznie pobierze dane i skopiuje D3 do D2. Steam Cloud również automatycznie pobiera brakujące dane przy każdym uruchomieniu Steam.
Krótko mówiąc, najważniejsze dla nas dane to D2. Jeśli potrafimy nim manipulować, możemy z powodzeniem usunąć dane, które chcesz usunąć.
Uwaga: niektóre gry nie mają D1 i bezpośrednio zapisują swoje dane w D2. Podczas gdy niektóre gry nie używają D2 jako medium i przesyłają dane do chmury bezpośrednio z D1.
Jaka jest zawartość danych użytkownika?
W katalogu Steam / userdata powinieneś mieć folder odpowiadający twojemu SteamID (możesz sprawdzić, jaki jest twój Steam ID, czytając nasz artykuł na ten temat). Po otwarciu zostaną utworzone foldery dla każdej gry, w którą grasz. Zostaną zidentyfikowani za pomocą ich AppID (AppID można łatwo sprawdzić, odwiedzając grę w sklepie Steam i wyodrębniając ją z adresu URL). W tym folderze gry znajdziesz dwie jednostki.
- remotecache.vdf: ten plik zawiera opis wszystkich właściwości plików znajdujących się w folderze zdalnym.
- Folder zdalny . Zawiera wszystkie pliki, które są zsynchronizowane z serwerem Steam Cloud.
Usuwanie danych z chmury
W tej metodzie będziemy postępować zgodnie z dwoma ważnymi krokami. Najpierw wyświetlimy powiadomienie o konflikcie Steam Cloud, a następnie usuniemy pliki Cloud.
Zwróć uwagę, że musisz wykonać te kroki, gra po grze, aby usunąć całą zawartość chmury Steam.
Najpierw musimy usunąć folder AppID z katalogu Steam. Po ponownym uruchomieniu komputera i Steam, Steam automatycznie ponownie utworzy folder. Musimy wykonać ten krok, aby upewnić się, że Steam Cloud działa idealnie i możemy kontynuować część usuwania.
- Otwórz swój katalog Steam . Domyślna lokalizacja twojej instalacji Steam to
C: \ Pliki programów (x86) \ Steam
- Search for a folder of AppID and Delete it. Then restart your computer and Steam. Start a game for a few minutes. Make sure that you have a working internet connection.
- Navigate back to the Steam directory and check if the AppID folder is back. If it is, it is confirmed that your Steam Cloud is working perfectly and we can proceed with the method.
Bringing Up Steam Cloud Conflict Dialogue
The first part of the solution is probably the most difficult. To delete all your Steam Cloud data, it is necessary to bring the conflict dialogue. Without it is not possible to delete the data present in your Cloud. Steam Cloud conflict occurs when the Cloud files differ from the data present on your hard drive.
There are two methods to bring about this conflict:
Method 1:
- Make sure that your Steam Cloud is enabled by following the steps mentioned above. Exit Steam completely by ending all the processes starting with Steamclientbootstrapper using the task manager.
- Now will alter all the files in the location
Steam\userdata\SteamID\AppID\remote
The objective is to make sure that all the files are different from those uploaded to the Steam cloud. We can’t simply delete the files from this location as Steam will automatically notice that the files are missing and download the same ones from the Cloud servers. We can achieve our task by corrupting them and making them 0-byte files.
- Navigate to
Steam\userdata\SteamID\AppID\remote
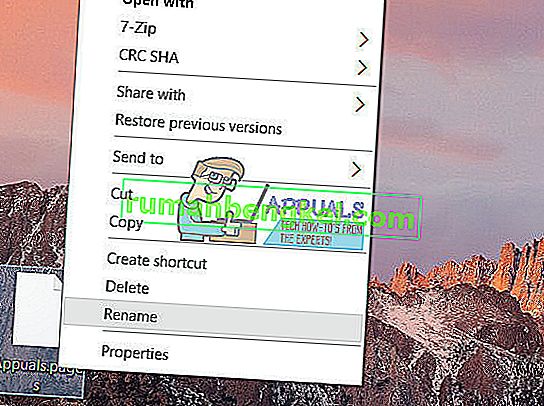
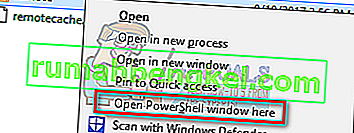
- Now hold shift and right-click on your remote folder. Select the option “Open PowerShell window here”.
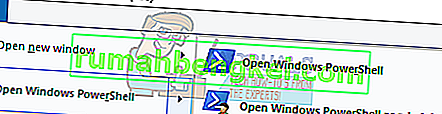
- You can also open PowerShell when in the folder by clicking the File option present at the top left side of the screen and selecting “Open Windows PowerShell as administrator”.
- Once PowerShell is opened, type the exact text written below


clc –path “C:\Program Files (x86)\Steam\userdata\SteamID\AppID\remote\*"
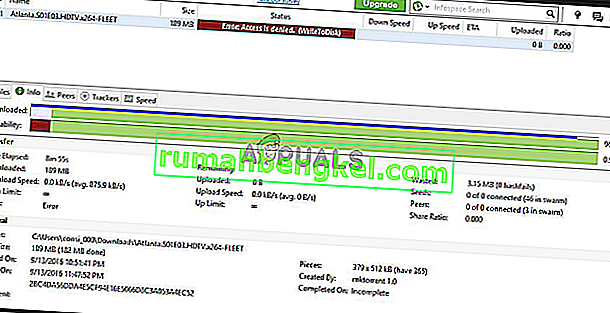
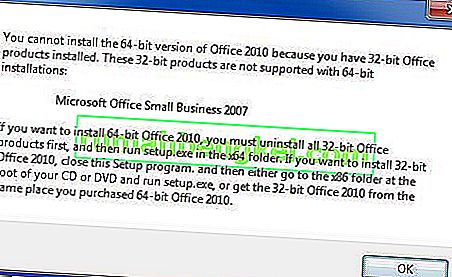
If you fail to write the correct code, you will get an error like this

If you correctly type in the line there will be no confirmatory message and you will get a window like this.

Start your Steam and there will be the conflict windows present on your Steam client.
Method 2:
This is an easier method as compared to the earlier one but it isn’t that efficient.
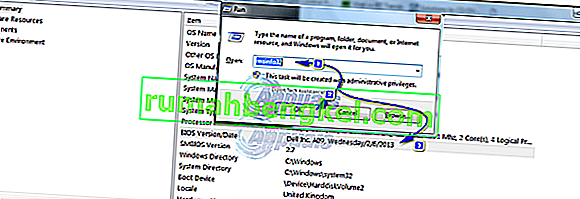
- Open your Steam client. Open its Settings by pressing the Steam button present at the top left corner of the window and selecting the option.
- Open the Cloud tab present on the left side of the screen. Uncheck the option “Enable Steam Cloud synchronization for the applications which support it”.

- Now navigate to your Stream directory as you did earlier and delete all files present in the folder of AppID. The file path for deletion is
Steam\userdata\SteamID\AppID.
- Now start the game to make new and different files in the file location.
- Exit the game and Steam completely by ending all Steam processes in the task manager (end steamclientbootstrapper first).
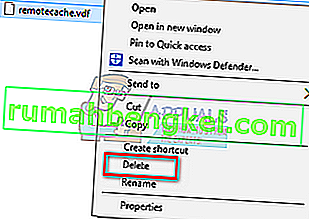
- Now delete the remotecache.vdf file present in the location
Steam\userdata\SteamID\AppID
- Start your Steam.
- Head over to the client’s Settings and enable the cloud.

Now a Steam conflict dialogue will come forth and we can proceed with the remaining method.
Deleting Cloud files
Once the Cloud conflict error is forth, don’t click any option and follow the instructions below.
- Navigate to the following file path
Steam\userdata\SteamID\AppID
and delete all the files in it. There will be two files (remote folder and remotecache.vdf). Delete both of them.
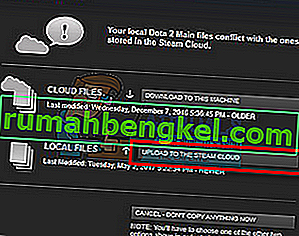
- Now go back to the conflict window and select the option of “Upload to the Steam Cloud”. Now Steam will sync your AppID folder while there will be nothing in it and the previous data on your Steam Cloud will be deleted.
- Now the game will start automatically but it will create new files that will be synced to your Steam cloud when you close it. We can prevent it from happening by pressing alt + tab. This will open the open windows on your screen. Select the Steam client from the list of windows.

- Once you are in the Steam client, open the client’s Settings. Navigate to the Cloud tab and uncheck the line which enables cloud.

- Now return to the game and exit. No files will be synced to your Steam cloud.
- Exit Steam and delete the AppID folder as we did before.


How to Make Sure If it Worked?
Remember how we checked at the beginning of this method if the Steam Cloud was running as expected by deleting the AppID folder and checking if it was made again. If there is no file present in the Steam cloud, there will be no file downloaded to your computer.
- Enable the Steam cloud as we did in the guide.
- Exit Steam completely by using the task manager.
- Delete the AppID folder (if you didn’t in step 2).
- Now check D3 (these are the cloud files) and compare them with D2 (local files on your computer). If there is nothing in D3, there will be nothing in D2 too!
- Check the following directory Steam\userdata\SteamID
No new AppID folder would have been created.
You can also check by logging Steam in on another computer and checking if the files exist.
If you make it till here without any problems, you have successfully deleted all the files on your Steam Cloud.
How to Delete Steam Cloud Saves from OS X
The procedures above can also be replicated on OS X and older Macs to a slight extent. By following the steps below, you will be able to delete your local saves. You can then disable the Steam Cloud synchronization from the Steam application, start a new game and create a few new saves. Then, when you return to re-enable the Steam Cloud synchronization features, the client will ask you which saves do you want to use. You can then choose the new ones which will delete and replace your old saves from the cloud.
To make things even clearer, here’s a step-by-step guide through the whole thing:
- Open your Steam application and go to Steam > Settings via the ribbon at the top of the window.
- In the settings menu, click on the Cloud tab and uncheck the box associated with Enable Steam Cloud synchronization for applications that support it.
- Close Steam completely and open your Finder app.
- Go to Library > Application Support > Steam > SteamApps > Common and open the folder of whichever game you want to delete the save files.
- Next, open the SAVE folder to reveal the saves of the game.
Note: If the location specified above doesn’t land you to the save files, try the following locations but mind the placeholders:
Users / *Your username* /Library / Application Support / *Game Folder* / Game Documents / *Game* / GameSaves Users/ *Your username* / Library / Application Support / Steam / userdata / *GameNumber* / remote Users/ *Your username* / Library / Containers / *Game Folder* / Data /Library / Application Support / *Game* / GameDocuments / *Game* / gamesaves
- Once you manage to identify and delete the local saves from the game you’re targeting, open the Game and create a few new saves.
- Exit the game, open steam and return to Steam > Settings > Cloud. From the cloud tab, re-enable the checkbox next to Enable Steam Cloud synchronization for applications which support it and click the OK button below.
- Steam will ask you whether you want to use the newly created local saves or the ones that you already have on the cloud. Choosing to use the new ones will delete the old saves that you currently have on Steam Cloud.