Użytkownicy zwykle napotykają ten problem po próbie aktualizacji systemu Windows 10 za pośrednictwem usługi Windows Update (WU). Błąd 0x8024a105sygnalizuje problem ze składnikami Aktualizacje automatyczne .Zwykle po nieudanej aktualizacji użytkownicy zobaczą następujący komunikat:
„Wystąpiły problemy podczas pobierania niektórych aktualizacji, ale spróbujemy ponownie później. Jeśli nadal to widzisz, spróbuj przeszukać internet lub skontaktować się z pomocą techniczną, aby uzyskać pomoc. Ten kod błędu może pomóc: (0x8024a105). ”

Jeśli obecnie zmagasz się z tym problemem, udało nam się zidentyfikować kilka realnych poprawek, które z powodzeniem pomogły użytkownikom w podobnej sytuacji jak Ty. Postępuj zgodnie z każdą z poniższych metod, aż napotkasz rozwiązanie, które pozwoli rozwiązać Twój problem.
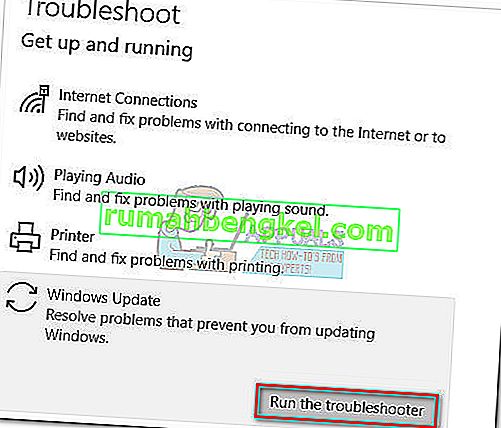
Metoda 1: Uruchomienie narzędzia do rozwiązywania problemów z usługą Windows Update
Zacznijmy prosto, uruchamiając narzędzie do rozwiązywania problemów z usługą Windows Update . Niektórym użytkownikom udało się zezwolić na aktualizację, umożliwiając wbudowanemu narzędziu do rozwiązywania problemów automatyczne naprawianie uszkodzonych komponentów. Oto krótki przewodnik dotyczący uruchamiania narzędzia do rozwiązywania problemów z usługą Windows Update :
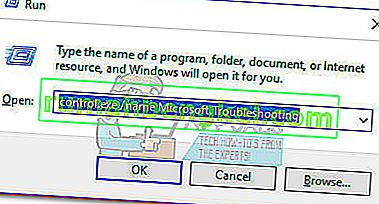
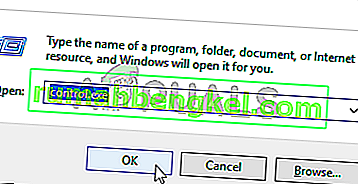
- Naciśnij klawisz Windows + R, aby otworzyć okno Uruchom. Wpisz lub wklej następujące informacje.
control.exe / nazwa Microsoft. Rozwiązywanie problemów
Naciśnij Enter, aby otworzyć wbudowane narzędzie do rozwiązywania problemów.
- W oknie Rozwiązywanie problemów kliknij Windows Update , a następnie kliknij Uruchom narzędzie do rozwiązywania problemów .
- Poczekaj, aż narzędzie do rozwiązywania problemów wykryje problemy z klientem aktualizacji. Jeśli uda mu się zidentyfikować jakiekolwiek problemy, postępuj zgodnie z instrukcjami wyświetlanymi na ekranie, aby uruchomić automatyczną naprawę. Zazwyczaj wystarczy wybrać opcję Zastosuj tę poprawkę .
- Jeśli narzędzie do rozwiązywania problemów z aktualizacjami zgłosi, że udało mu się cokolwiek naprawić, uruchom ponownie komputer i sprawdź, czy problem został rozwiązany przy następnym uruchomieniu.


Jeśli aktualizacje nadal kończą się niepowodzeniem z błędem 0x8024a105 , przejdź do metody 2.
Metoda 2: Zmień ustawienia kontroli konta użytkownika (UAC)
Jeśli narzędzie do rozwiązywania problemów nie zdołało automatycznie rozwiązać problemu, zobaczmy, czy problem nie jest tworzony przez ustawienie Kontroli konta użytkownika . Jak się okazuje, niektóre aktualizacje kończyły się niepowodzeniem z błędem 0x8024a105, ponieważ zalogowane konto nie ma niezbędnych uprawnień. Możesz łatwo rozwiązać ten problem, zmieniając uprawnienia kont użytkowników związane z kontem na administratora. Oto krótki przewodnik, jak to zrobić:
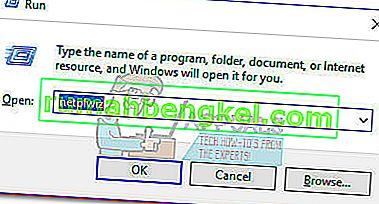
- Naciśnij klawisz Windows + R, aby otworzyć okno Uruchom. Wpisz lub wklej „ netplwiz ” i naciśnij Enter, aby otworzyć wbudowane narzędzie do rozwiązywania problemów.
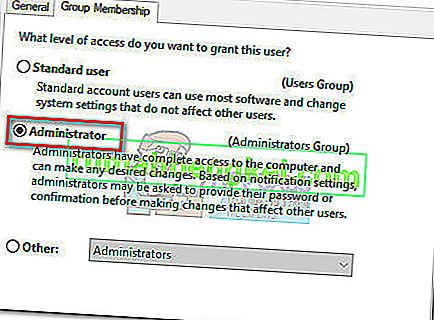
- Na karcie Użytkownicy wybierz użytkownika, którego używasz, i kliknij Właściwości.
- W oknie Właściwości przejdź do Członkostwo w grupie i ustaw poziom dostępu dla administratora . Kliknij Zastosuj, aby zapisać zmiany.
 Uwaga: Jeśli poziom dostępu jest już ustawiony na Administrator , przejdź bezpośrednio do metody 3 .
 - Uruchom ponownie komputer i upewnij się, że logujesz się na to samo konto użytkownika. Po zakończeniu uruchamiania spróbuj ponownie wykonać aktualizacje. Jeśli zauważysz, że zawiodły z błędem 0x8024a105 , przejdź do trzeciej metody.

 Uwaga: Jeśli poziom dostępu jest już ustawiony na Administrator , przejdź bezpośrednio do metody 3 .
Metoda 3: Ręczne resetowanie składników aktualizacji systemu Windows
Jeśli powyższe metody okazały się nieskuteczne, nie mamy innego wyboru, jak ręcznie zresetować składniki aktualizacji systemu Windows, a następnie ponownie uruchomić proces aktualizacji systemu Windows . Spośród czterech przedstawionych metod, ta ma większe prawdopodobieństwo sukcesu, ale wymaga więcej poprawek.
Oto krótki przewodnik dotyczący resetowania składników aktualizacji systemu Windows:
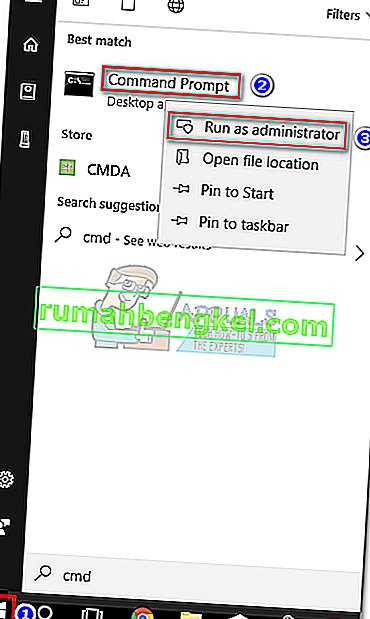
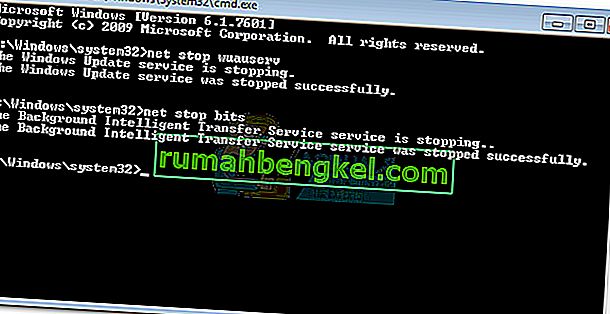
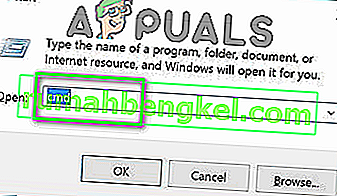
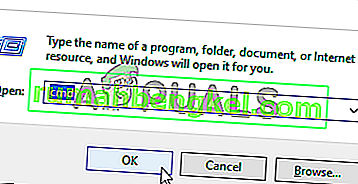
- Kliknij pasek Start systemu Windows (lewy dolny róg) i wyszukaj „ cmd ”. Następnie kliknij prawym przyciskiem myszy wiersz polecenia i wybierz Uruchom jako administrator .
- W podwyższonym wierszu polecenia zatrzymamy usługi Instalatora MSI, Windows Update, BITS i Cryptographic . Aby to zrobić, wstaw następujące polecenia i naciśnij Enter po każdym z nich:
net stop wuauserv net stop cryptSvc net stop bits net stop msiserver
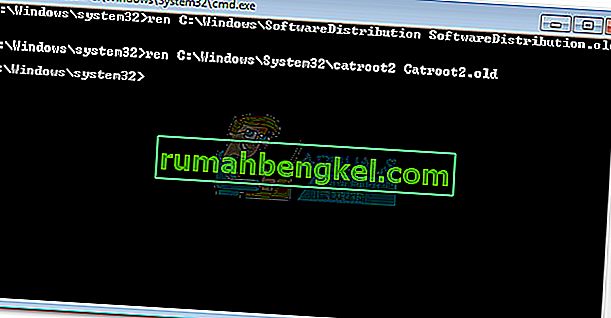
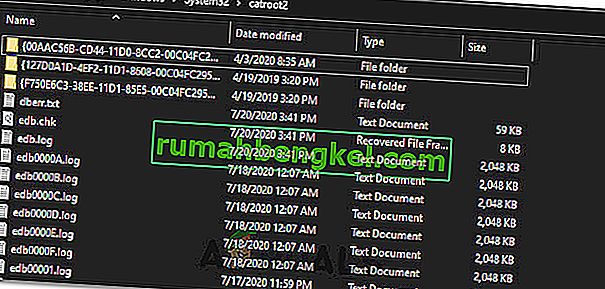
- Po zatrzymaniu wszystkich usług zmieńmy nazwę folderu SoftwareDistribution i folder Catroot2 , aby zmusić Windows Update do ponownego zainicjowania jego składników. Wklej lub wpisz dwa polecenia w podwyższonym wierszu polecenia i naciśnij klawisz Enter po każdym z nich:
ren C: \ Windows \ SoftwareDistribution SoftwareDistribution.old
ren C: \ Windows \ System32 \ catroot2 Catroot2.old
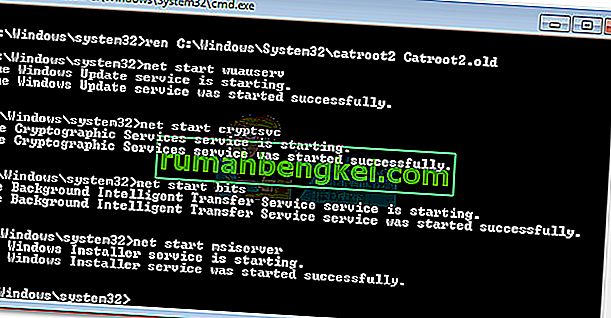
- Po zmianie nazw obu folderów nadszedł czas, aby ponownie uruchomić usługi MSI Installer, BITS, Cryptographic i Windows Update. Aby to zrobić, wpisz następujące polecenie w wierszu polecenia i naciśnij klawisz Enter po każdym poleceniu:
net start wuauserv net start cryptSvc net start bits net start msiserver
- Po ponownym uruchomieniu usług zamknij wiersz polecenia z podwyższonym poziomem uprawnień i uruchom ponownie komputer.


Metoda 4: Usuń folder dystrybucji oprogramowania
W niektórych przypadkach problem można rozwiązać po prostu usuwając folder za pomocą programu PowerShell. Dlatego w tym kroku najpierw uruchomimy PowerShell jako administrator, a następnie usuniemy folder dystrybucji oprogramowania, aby rozpocząć proces aktualizacji. Za to:
- Naciśnij jednocześnie przyciski „Windows” + „X” i wybierz opcję „Power Shell (Admin)” .
- Wpisz następujące polecenie i naciśnij „Enter”, aby je wykonać.
net stop wuauserv
- Ponownie wpisz następujące polecenie i naciśnij „Enter”.
bity stopu netto
- Na koniec przejdź do następującego folderu.
C: \ Windows \ SoftwareDistribution
- Naciśnij „Ctrl” + „A”, aby zaznaczyć całą zawartość folderu i naciśnij „Shift” + „Del” , aby je trwale usunąć.
- Potwierdź wszelkie monity ostrzegające o usunięciu tych plików, a następnie uruchom ponownie komputer, aby zakończyć proces.
- Teraz spróbuj zaktualizować i sprawdź, czy problem nadal występuje.

Po uruchomieniu kopii zapasowej komputera sprawdź, czy możesz zainstalować aktualizacje bez błędu 0x8024a105 . Jeśli tak, spróbuj wykonać skanowanie SFC, aby naprawić wszelkie problemy z brakującymi plikami lub sterownikami.
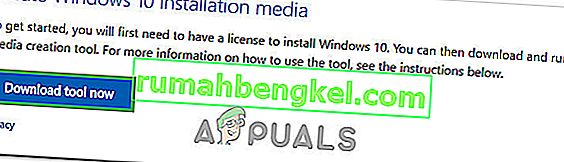
Metoda 5: Aktualizacja za pomocą narzędzia do tworzenia nośników
W niektórych przypadkach aktualizacja komputera przy użyciu domyślnego procesu Windows Update może być niemożliwa, ponieważ system Windows może nie być w stanie ustanowić prawidłowego połączenia z serwerami aktualizacji. Dlatego w tym kroku będziemy wdrażać narzędzie Windows Media Creation Tool, aby wykonać aktualizację za nas. Automatycznie pobierze i zainstaluje pliki aktualizacji, aby zaktualizować nasz system Windows. Za to:
- Pobierz stąd narzędzie Windows Media Creation Tool.
- Run the executable and follow with the on-screen instructions for the initial setup.
- After the initial setup, select the “Upgrade this PC” option and click on “Next”.
- Accept the License terms and let the installer run.
- The tool will now automatically grab the update files from the servers and update your computer to the latest version available.
- Check to see if doing so has fixed the error.

Method 6: Delete Download Folders
When a new update is downloaded, it is generally stored in some folders on the computer. In this step, we will be deleting some of these folders and which will prompt the operating system to go ahead and download new files which can sometimes clear out the error and the update will be applied normally. For that:
- Press “Windows” + “R” to open the Run prompt.
- Type in “Control Panel” and press “Enter” to launch the classical control panel interface.
- In the Control Panel, click on the “View By:” option and select “Large Icons” from the list.
- Click on the “File Explorer Options” and a new window should pop up.
- In the File Explorer Options, click on the “View” button and then double click on the “Files and Folders” button to expand it.
- After that, double click on the ‘Hidden Files and Folders” to expand it as well.
- Check the “Show hidden Files, Folders and Drives” option and click on “Apply” to save your changes.
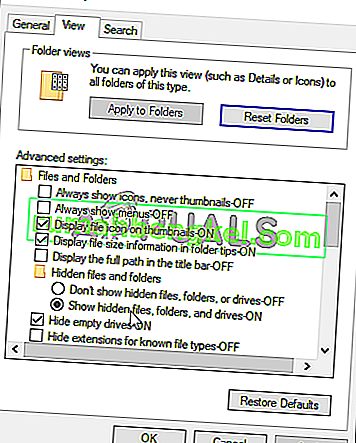
- Click on “OK” to close out of the window and press “Windows’ + “E” to launch the file explorer.
- In the File Explorer, delete the “$Windows.~WS” and “$Windows. ~BT” folders.
- Make sure to clear out the recycle bin as well so that they cannot be recovered.
- After this, press “Windows’ + “I” to launch settings and click on the “Update and Security” option.
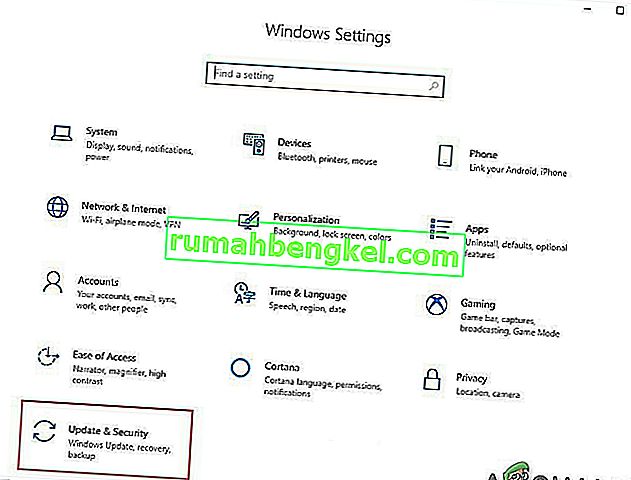
- In Update and Security, click on the “Windows Update” option on the left pane and then click on the “Check for Updates” button.
- Updates will now automatically be downloaded and installed.
- Check to see if the issue persists.


Method 7: Resetting Catroot2 Folder
In some cases, it is possible that the Catroot2 folder and its files have either been corrupted or they have been misconfigured due to which this issue is being triggered. Therefore, in this step, we will first be making some changes from the command prompt and then we will delete the files inside that folder. For that:
- Press “Windows’ + “R” to launch the run prompt.
- Type in “cmd” and then press “Shift” + “Ctrl” + “Enter” to provide administrative privileges.
- Type in the following command and press “Enter” to execute it.
net stop cryptsvc
- After you have stopped the cryptsvc using the command above, type in the following commands into the command prompt one by one and press “Enter” after each to execute them on your computer.
md %systemroot%system32catroot2.old xcopy %systemroot%system32catroot2 %systemroot%system32catroot2.old /s
- After executing the commands stated above, we will be deleting all the files from the catroot folder without deleting the folder itself.
- Press “Windows’ + “R” to open the Run prompt and type in the following address to navigate to the catroot folder.
C:/Windows/System32/catroot2
- Press “Ctrl” + “A” once inside the folder to select all items inside it and press “Shift” + “Delete” to remove them from your computer.
- After removing these, confirm any prompts that might spring up on your screen.
- After that, open the command prompt back up and execute the following command.
net start cryptsvc
- Try to update your computer and check to see if the issue still persists.


Method 8: Configuring Services to Start Automatically
Sometimes, your computer might be preventing certain services from starting and functioning in the background due to which the update might not be properly installed or configured to be applied on your computer. Therefore, in this step, we will be setting up some services to startup automatically. For that:
- Press “Windows’ + “R” to launch the Run prompt.
- Type in “cmd” and press “Ctrl” + “Shift” + “Enter” to provide admin permissions.

- Type in the following commands one by one in the command prompt and press “Enter” after each to execute them.
SC Config wuauserv start=auto SC Config bits start=auto SC Config cryptsvc start=auto SC Config trustedinstaller start=auto
- This way, we will have configured these services to startup and run automatically in the background.
- Check to see if the issue persists.

Method 9: Re-register Windows Update and BITS Files
It is possible that some windows update files and Bits files might not be properly registered on your computer. Therefore, in this step, we will be re-registering these files on the computer and then we will check to see if that fixes our issue. For that:
- Press “Windows’ + “R’ to open the Run prompt.
- Type in “cmd” and then press the “Ctrl” + “Shift” + “Enter” buttons to provide admin permissions.
Type in the following commands one by one and press “Enter” after each to register the components.regsvr32.exe atl.dll regsvr32.exe urlmon.dll regsvr32.exe mshtml.dll regsvr32.exe shdocvw.dll regsvr32.exe browseui.dll regsvr32.exe jscript.dll regsvr32.exe vbscript.dll regsvr32.exe scrrun.dll regsvr32.exe msxml.dll regsvr32.exe msxml3.dll regsvr32.exe msxml6.dll regsvr32.exe actxprxy.dll regsvr32.exe softpub.dll regsvr32.exe wintrust.dll regsvr32.exe dssenh.dll regsvr32.exe rsaenh.dll regsvr32.exe gpkcsp.dll regsvr32.exe sccbase.dll regsvr32.exe slbcsp.dll regsvr32.exe cryptdlg.dll regsvr32.exe oleaut32.dll regsvr32.exe ole32.dll regsvr32.exe shell32.dll regsvr32.exe initpki.dll regsvr32.exe wuapi.dll regsvr32.exe wuaueng.dll regsvr32.exe wuaueng1.dll regsvr32.exe wucltui.dll regsvr32.exe wups.dll regsvr32.exe wups2.dll regsvr32.exe wuweb.dll regsvr32.exe qmgr.dll regsvr32.exe qmgrprxy.dll regsvr32.exe wucltux.dll regsvr32.exe muweb.dll regsvr32.exe wuwebv.dll
- After executing the commands listed above, check to see if the issue still persists.

Note: After trying the following fixes, if the issue still persists, try to perform a clean boot and check if that fixes it. If it does, update in the clean boot and then get out of it after the update is completed. If that doesn’t work, try to go for a clean install of Windows.